Acceptance-With-Joy

“I want to be Acceptance-With-Joy . Whatever He lets me go through, I want to trust Him and allow Him to have His way with my life. And I want to do it with joy in my heart.” writes Hannah Hurnard in her best known and best loved book Hinds’ Feet On High Places.

That’s my heart today. THAT is what I want.

A right attitude says:grapevine

“though the fig tree does not bud

and there are no grapes on the vine…

yet I will rejoice in the Lord,

I will be joyful in God my Savior.”

Habbakuk 3:17-18

Making the choice to keep looking up,

A Homemaker

Homemade Sassafras Root Beer

We prepared our first batch of homemade root beer last summer while staying at Grandpa and Grandma’s. It was a delicious adventure!root beer

It started out because of a craving. On a scorching summer day, I was craving a can of pop. (Are you with me? Every once in  a while, an ice cold carbonated drink is just what one longs for in the dog days!) And for our family, soda pop is a real treat. We don’t have it very often.

The trouble? I have kids that can’t tolerate ingredients found in most sodas so we either find certain beverages that they can have or I get to be creative with making ‘special drinks’ for them.

All that to say, it was hot, soda pop was my craving, and we were in a bind. No beverages available that we could all enjoy and a Momma with a bit too much time on her hands (apparently!).

Now, sassafras is a plant that grows wild all over the U.S. and was the traditional root for what we call root beer. I remembered finding lots of sassafras growing on our property as a kid, so I decided that since I was on my old stomping grounds I would see just how easy (or difficult) it would be to make some homemade root beer from the plants.

I found a good recipe here that I’ll be sharing (below). This site also has a nice description of where to find sassafras plants and what the leaves look like – essential for the novice! Check out the article if you need some assistance. (My tip for the doubting sassafras hunter? Just break a stem and sniff! If you’ve got the right plant, it should smell like – you guessed it – root beer!)sassafras

Motivated by a craving, and having located a recipe, we set out on an adventure! Here it is… in brief.

After announcing the idea to an eager and energetic crew (my kids and a few cousins), I climbed in the cab of my dad’s 1978 Chevy pick-up truck (a pretty green colored camper special) and gave the big, rusted door a hard slam. Eight kids (ages 4-10) piled in back, whoopin’ and hollerin’. I cracked open the center back window and advised them to stay on their rears while I was driving through the field and neighboring orchard in search of the precious root. Or else! That worked… for a few minutes.

As we bounced along, teeth rattling in wide grins seen through the rear-view mirror, I thought about the fact that even if the soda didn’t turn out, the memories we’d make would last!

Before long, we’d located a whole row of sassafras saplings along the edge of the woods across from the cherry trees. Within a short amount of time, we’d pulled up a few bundles of the precious young plants and had loaded back into the truck for the jarring ride back to Grandma’s.

I used some pruning shears to trim the plants at the house and had the kids hall the tops to the burn pile out back. Then we scrubbed (okay, I had them do all of this part!) the roots at the hand-pump outdoors and put the clean roots in plastic bags. These we placed in the refrigerator to store until the cooking process the following day. (Having to wait a day just made the homemade drink taste that much better, I think! Nothing like a bit of anticipation to heighten the senses!)sassafras2

The following day, we cut up the roots, boiled them with some molasses and a few spices, and boy did it smell good! Then we strained the roots out, added sugar and finished the process. After cooling the syrup down, we added some of it to a bottle of club soda and (tadaa!) we’d made our very own sassafras root beer!

Want to give it a try? Start watching for some sassafras and get it while the stems are still young and tender. And, like I said earlier, even if the soda doesn’t turn out just the way you were hoping, at least you’ll have some fun memories to treasure forever!

The recipe we followed is below.

Homemade Sassafras Root Beer Recipe

  • Prep time: 10 minutes
  • Cook time: 30 minutes
  • Yield: Makes about 2 1/2 quarts.

Ingredients

  • Several roots (including some green stems) from sassafras saplings, about 30-40 inches worth of 1/4-inch thick roots (enough to fill one cup when you chop them into 1/2-inch pieces)
  • 4 cups water
  • 2 cloves
  • 1/2 teaspoon anise seeds (can sub fennel)
  • 4 allspice berries
  • 1-inch of stick cinnamon
  • 1/4 cup molasses
  • 1 cup sugar
  • 2 quarts soda water

Method

sassafras-root-beer-1.jpgsassafras-root-beer-2.jpg sassafras-root-beer-3.jpgsassafras-root-beer-4.jpg

1 Scrub the roots clean of any dirt.  Cut the roots into 1/2-inch long pieces. (The roots can be tough, if you have a pair of pruning shears, they work great to cut the roots.) If you have a few green stems, you can include them too, but you should have mostly roots.  Cut up as much as you need to fill one cup.  Put the roots into a small pot and cover with 4 cups of water.  Add the cloves, anise seeds, allspice berries, and cinnamon stick.  Bring to a boil, reduce to a simmer, and simmer for 25 minutes.  Add the molasses and simmer for 5 minutes more.  Remove from heat.

2 Strain through cheesecloth or a fine mesh sieve lined with a paper towel.  Rinse out the pot.  Return the liquid to the pot.  Add the sugar, heat until just a simmer and the sugar has dissolved.  Remove from the heat and let cool.

3 To assemble the root beer, fill a glass with ice cubes, add the syrup and soda water in a 1:2 ratio, so 1/3 cup of syrup to 2/3 cups of soda water.  Add more soda water if you want it more diluted, add more syrup if you want it stronger.

Ice Pack

Spring is here!

As the days get warmer, the more running, jumping, kicking, and active play will happen out-of-doors… without the layer upon layer of outerwear.

We are soooo happy! (And all the children {AND their mothers} said “Yippee!”.)

With the increase of activity (and the decrease of padded clothing) comes a greater potential for injury. So let’s not begin to fret and worry; let’s just be prepared by making an ICE PACK… ahead of time. Just in case! It’s very simple and it only uses two ingredients: rubbing alcohol and water.

Homemade Ice Pack Recipe:ice pack

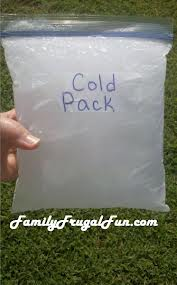
Combine one part rubbing alcohol with three parts water.

Place in a one-gallon zip lock bag. Seal tightly. Place this bag into another one-gallon zip lock. (In other words, double bag it!).

Lay it flat in the freezer for 3 hours and it will turn to gel. It gets really cold but it’ll never harden!

When in need, place the ice pack over a warm, damp cloth on the skin for 10 – 20 minutes at a time. When finished, place it back in the freezer until it’s needed again. (It takes about 1 hour to refreeze it.)

*******************************

Now, it’s confession time. I am NOT a medical doctor and I will not be giving you medical advice today. I am simply sharing a recipe for a homemade ice pack. {In other words, I am NOT qualified to tell you when to use (or NOT use) the aforementioned ice pack!!!}

However, I do have a wonderful book written by one of America’s leading pediatricians and I will now quote him in his book “How to Raise a Healthy Child…” In a section titled ‘Sprains, Strains, and Fractures’ Dr. Robert S. Mendelsohn, M.D. states:

The bone and muscle structure in children differs significantly from that of adults, and this affects the type of injury that occurs to arms and legs. Sprains, which involve the tearing or stretching of a ligament, are seldom seen in young children because the ligaments are not yet firmly attached to the bone. Growing children are more likely to suffer damage to the epiphysis, which is the soft end of the bone where growth occurs. If your child twists his wrist, knee, or ankle, and the swelling and pain persist for two days or more, see a doctor because, if it is a fracture of the epiphysis, it requires casting…

                If your child suffers a leg injury from twisting an ankle or a knee, there is no need to seek medical attention immediately. Delaying for a couple of days to see if the pain and swelling subside will not impede the treatment, if the injury proves to be a fracture and medical help must be sought. Encourage your child to keep his weight off the injured member and apply ice packs to the injured area to reduce the swelling. This will cease to be of value after an hour or so, and many doctors recommend that heat then be applied to improve the circulation in the injured member.foot

                I should note, in all candor, that this is one of the many situations in which the “science” of medicine is less than precise. There is vast disagreement over whether the application of cold or the application of heat is the best treatment for a sprained ankle… no one really know which works best for sprained ankles – heat or cold. The important thing is to immobilize the ankle and wrap it with an elastic bandage to prevent motion that will aggravate the injury. Just be sure that the bandage is not applied so tightly that it cuts off circulation. Don’t listen to anyone who tells you that the best treatment for a sprain is to have your child walk on it at once. Pain is nature’s way of telling you that something is wrong, so if your child’s ankle hurts, the message is “keep off!”

Later in the book, Dr. M mentions that it is estimated that about 98% of the x-rays ordered for arm and leg injuries for children do not reveal a fracture, so it is obvious that many are ordered frivolously. Waiting two days, and using common sense, seems prudent. However, as stated earlier, I am not giving you any medical advice. You are solely responsible for the health care decisions of your own child. I just hope the ice pack comes in handy sometime. Because it’s perfect for wrapping around bumps, bruises, aches & pains! And it is such a cinch to make!

Clean Windows &Young Kids

Cleaning your house

while your kids are still growing

is like shoveling the walk

before it stops snowing.

–Phyllis Diller

The same could be said of washing windows, in my opinion. Why do we even try, Mommas? How many times have I washed the windows and put away the paper towel only to turn and find two palms pressed against the glass with a nose and forehead leaning firmly between them, innocently staring out the very pane I just wiped! Ahhhh!!!window3

As the frustration begins to well up in my soul, the words of older, wiser women come to mind. “Before you know it, they’ll be gone and you’ll be wishing their little fingerprints were still on your windows to remind you of the days when they were at home.”

Rather than melting in anguish, I choose to speak truth to myself. Yes, I need to be diligent and clean my home… and even the windows on occasion. But no, as long as there are little people living here, the windows won’t stay spotless for long. Neither will the house, for that matter. Things naturally tend toward disorder, not order. And that’s okay! I need to keep things in perspective.  A clean, healthy home is important; relationships with family are essential.

So that means if you stop in for a visit (and please do!), you’ll most likely notice smudged windows. They shouldn’t be filthy; we’ll be washing them this week. But there will probably be visible evidence that I am a blessed woman with busy and curious children in my home! And that’s the way I want it.

(In case you’re inspired to do some window washing of your own, which isn’t likely after reading the last several paragraphs (wink), here is my homemade natural  Glass Cleaner recipe.)windows2

GLASS CLEANER

4 oz distilled water

4 oz distilled white vinegar

1/8 t. liquid Ivory detergent

3 drops peppermint (or other) essential oil

(Put all the ingredients in a spray bottle and get to work!)

A Sticky Subject

This is sort of a sticky topic for my blog…. but I’m not going to shy away from it. Nor am I going to ease into it slowly. I’m just going to take the plunge. So here it is. Ready or not.

Tape.

Mailing tape.

 See? I told you it was a sticky subject! Ha ha ha!!! Had you worried, didn’t I?  But seriously, tape is sticky and I LOVE tape.

Mailing tape. Packaging tape.  Heavy duty tape. tapeWhatever you want to call it, I am fond of tape. The wide, thick, sticky adhesive is the kind I’m partial to. And I’ve found all sorts of ways to use it. Rolls and rolls and rolls of it over the years.

Here is a partial list of the ways in which I’ve used mailing tape.

  • to attach labels to containers

(turning that old baby-wipes tub into a crayon carton, etc)

  • to attach recipes to containers

(the recipe for my homemade all-purpose cleaner, for example, is right on the bottle… so handy! Saves time and energy when making a new batch.)

  • to make a cast for an arm or leg of an injured doll or teddy

(simply wrap the injured appendage in toilet paper or Kleenex, then roll a bit of mailing tape over the ‘cloth’ bandage and Voila! you’ve got a cast.)

  • to fix book covers that are torn or falling apart

(you knew that one was going to be a part of this list, right?)tape2

  • to “laminate” often-used recipe cards, instruction cards, etc.

(they last longer and are so much easier to wipe off if (when) they get messy!)

  • to attach paper or plastic plates to the picnic table

(I know, I’m weird.  BUT if it’s a nice day outdoors {just a bit WINDY!} and the kids want to eat outside, I’m not too keen on chasing plates around the deck/yard OR refilling plates with new food because the first serving is now grub for the squirrels and ants!!! By taping the plate down, my troubles are the only things that fly away!)

There you have it. A few reasons why a roll of packing tape can always be found near my desk. We’re good friends, Tape and I. We kinda stick together!

(I’d love to hear some of the ways YOU use tape around the home… Will you share your ideas with me??)